Click on the DummyAnim prefab in the Heirarchy window.
Click on the little arrow beside "Animations" to expand the selection.
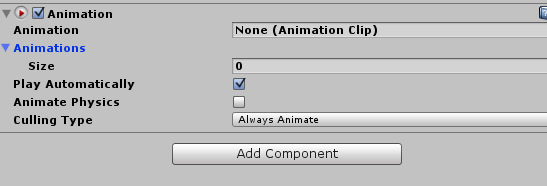
You'll see a Size. The Animations are stored as an "array". The size of the array is how many different animations you want to add. We can always adjust this after we've added animations, so to start off, we'll change the size to 7. Enter 7 in the Size text box, and hit Enter.
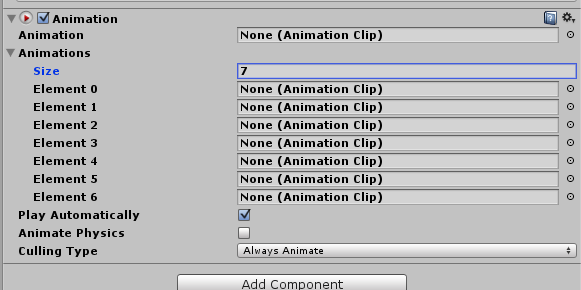
You should see Element 0 to 6 now. The Size of 7 starts counting at 0, that's why it only goes up to Element 6.
Notice the little circle at the end of each of the Elements Text box (and the Animation Text box)? That will open up the select of which animation you want to select. The order of the animations don't matter in this context.
On the line with Element 0, click on the circle. It will open up the Animation Selector box.
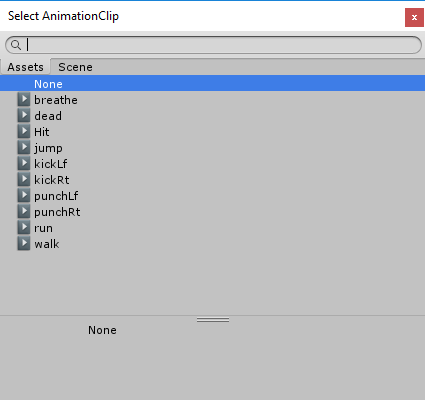
Note: If you have multiple animations from other assets, you will see them all here, often with the same name.
Click once on the "dead" Asset.

At the bottom, you'll see where it says "Assets/Dummy_animation/Model/DummyAnim.fbx". That tells you that the animation is for the DummyAnim. If this was an animation from another set, it'd give a completely different path. Selecting a different animation for an asset will have undesired effects.
Double click on "dead" to add it to the Animations list.
Go down the list of each Element, adding the different animations to it. Once complete, you can go to the Animation, and select a default one. For our default, we'll use breathe.
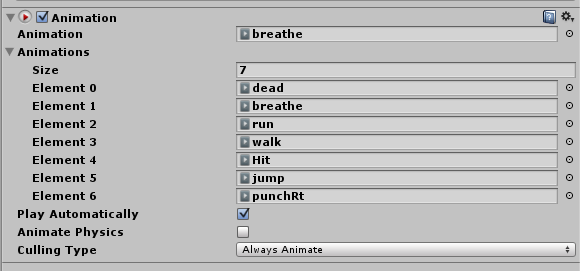
Keep in mind our basics animation actions that we are looking for: Idle, Walk, Run, Hit, and Die. In the Dummy Anim, we are missing some of these animations, so we'll just use our imagination on some.
Created with the Personal Edition of HelpNDoc: Full-featured Documentation generator